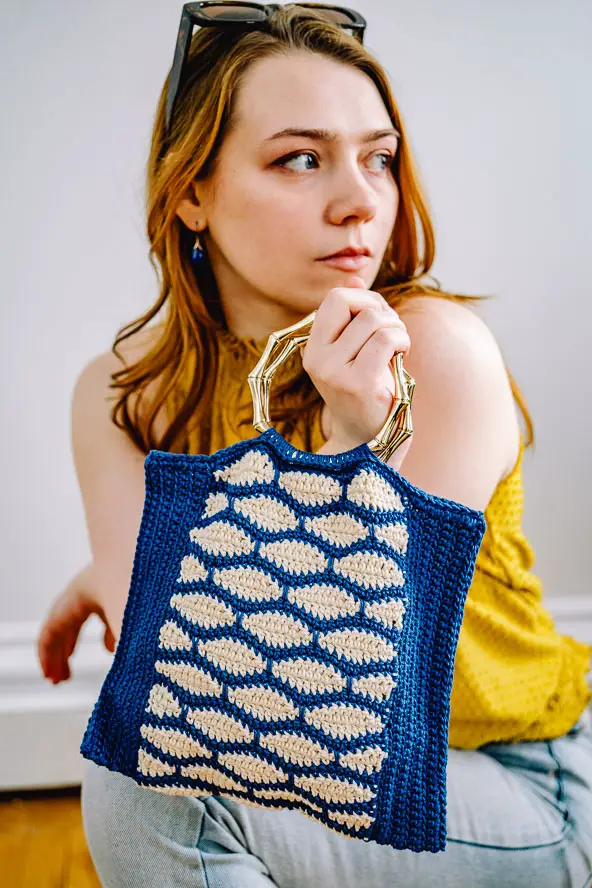
This is my version of the widely popular granny square bag and I call it XO Bag because the geometrical design of the squares creates the X’s and little O’s.


XO Bag is intermediate skill level crochet project. It is quite easy to crochet the squares but the stitching of squares will require more effort and skill. For all the beginners eager to make this bag I recommend watching my video tutorial to see the exact stitch placement. It’s doable!
VIDEO TUTORIAL OF XO BAG
WRITTEN PATTERN OF XO BAG
If you prefer ad-free printable PDF pattern, you can get it on:
I use Bernat Softee Baby Cotton yarn, it is size 3 – light. The colors in tutorial are Cotton (color A) and Soft Plum (color B). One ball has 254 yards and one of each color is enough. Crochet hook is size 3.75 mm. And my bag measures about 13 inches from top to bottom and 12.5 inches wide. The handles measure about 18 inches long.
In case you want to use a different yarn, check out this great source for yarn substitution.
Abbreviations:
ch = chain
dc = double crochet
sl st = slip stitch
beg = beginning
sc = single crochet
sc3tog = single crochet 3 together
XO Bag is made in 3 steps:
- Crochet 13 squares
- Connect the squares
- Crochet edge and handles
- STEP 1 – make 13 squares.
- With color A make a magic ring:
- Round 1 – ch 3, dc 15 in the ring, sl st in 3rd beg ch, fasten off, cut off color A.
- Round 2 – join color B in dc before beg 3ch of round 1, ch 3, dc in top of beg 3 ch, dc 1 in each next 2 dc, (in next dc dc2+ch2+dc2 for corner, dc 1 in each next 3 dc) three times, for last corner dc2+ch2+dc1 in same st of beg 3ch, sl st in 3rd beg ch.
- Round 3 – ch 3, dc 1 in each next 5 dc, (in next ch2-space dc2+ch2+dc2 for corner, dc 1 in each next 7 dc) three times, dc2+ch2+dc2 in last ch2-space, dc in next dc, sl st in 3rd beg ch.
- Round 4 – ch 3, dc 1 in each next 7 dc, (in next ch2-space dc2+ch2+dc2 for corner, dc 1 in each next 11 dc) three times, dc2+ch2+dc2 in last ch2-space, dc 1 in each next 3 dc, sl st in 3rd beg ch.
- Round 5 – ch 3, dc 1 in each next 4 dc, finish the last dc with color A (leaving 10-inch tail for stitching make a slip knot with color A and pull it through last 2 loops of dc), with color A dc 1 in each next 5 dc, (in next ch2-space dc2+ch2+dc2, dc 1 in each next 5 dc, finish the last dc with color B, continue with color B – dc 1 in each next 5 dc, finish the last dc with color A, continue with color A – dc 1 in each next 5 dc) three times, dc2+ch2+dc2 in last ch2-space, dc 1 in each next 5 dc, finish the last dc with color B, sl st in 3rd beg ch. Fasten off, cut off and leave the tails about 10 inches long for stitching.
- STEP 2 – connect the squares.
- Using the tails of last round of each square (stitching through color A loops with color A tail and through color B loops with color B tail), stitch the sides of 8 squares to form this shape:

- Fold the piece in half and stitch the sides of first and last square to form the bag body:

- Attach the first two bottom squares:

- Attach the next 2 bottom squares on the opposite side.
- Attach the last square to the bottom, first stitching the two sides (1st photo), then turn the piece around to opposite side, fold the bottom square upwards and stitch the remaining 4 sides:


- STEP 3 – crochet edge and handles.
- Round 1 – join color A with sc in upper right ch2-space, *sc in each next dc, in lower corner sc3tog inserting hook in each ch2-space of three connecting squares, sc in each next dc on the next square, sc 2 in upper corner ch2-space, repeat from*, end the round with 1 sc in beg ch2-space, sl st in first sc.
- Round 2 – (ch 90 for handle, skip 40 sc (including sc3tog), sc in each next 19 sc, sc3tog in next 3 sc, sc in each next 20 sc) twice.
- Round 3 – (sc in each ch, sc in each next 18 sc, sc3tog in next 3 sc, sc in each next 19 sc) twice.
- Round 4 – (sc in each sc until 3 sc in lower corner – make sc3tog) twice, sc in each remaining sc, sl st in first sc.
- Fasten off, cut off, weave in ends.
Check out all my crochet bag tutorials & patterns here.
HAPPY CROCHETING!
COPYRIGHT:
You may not sell my pattern or claim it as your own.
You may make items to sell (i.e. on Etsy, at craft fairs) from my pattern but I ask that you link back to my blog handmadebyraine.com and provide credit for the pattern.
You are welcome to share my pattern on social media as long as you link back directly to my blog post (providing the link). No copy & paste of my pattern will be allowed under any circumstances.
Some links in this post are affiliate, meaning I’ll make a small commission if you make a purchase, but this is at no cost to you.




2 Comments